Blah, Blah, Blah Is that what you hear when the photographer is explaining what equipment they use, why, and how it benefits your clients. Is what being offered perfect, is it professional, or is it amateur hour? Some basic information event planners should know is….

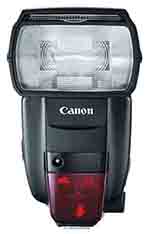
On Camera Flash vs Studio Lights 
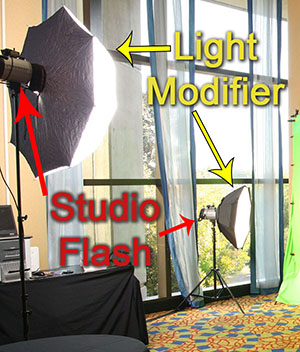
On Camera Flash produces a smaller & harsher light compared to studio lights. On camera flash units are battery powered, portable, have limited light modifiers available, and much less powerful than studio lights. Used when a photographer must move quickly; e.g. weddings, sports, award ceremonies, etc.
  Professional Studio Lights produce a consistent light, softer, more natural light. Studio lights can be used with light modifies, to shape light, making everyone look their best in the photograph. Studio lights are mounted on a light stands, they can be fine-tuned from low to high power, usually used in conjunction with multiple lights, with light modifiers.

Light Modifiers

Light Modifiers are used to shape, control, and spread light. Some types of light modifiers are; softbox, octabox, beauty dish, umbrella, parabolic reflector.

Ink Jet printer vs Dye Sub Printers

Ink jets printers, yes, it is what you think, similar to the one you have at home or at the office. Spraying ink onto paper to produce an image. Inkjet printers should not be used at events when required to produce high volumes of 4×6”, 5×7”, 6×8”, 8×10”, and 8×12” prints quickly. There slow, run out of ink during an event, photographs can be wet after printing, machines are not as durable when moving from event to event.
Dye Sub printers use media. What’s media; a substrate – cyan, magenta, yellow, and a protective clear coat. With a little heat & paper a dye sub printer produces a beautiful, dry image, a photograph that will last for decades. Professional Dye Sub printers are FAST – Some machines produce 4×6” photographs in 8 seconds. The top dye sub printers like Mitsubishi use metal cases, instead of plastic, giving the machines durability.

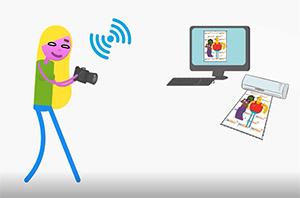
Camera Wi-Fi – Tethered Camera – Camera Card Swap

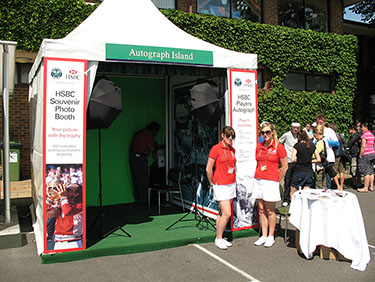
Camera Wi-Fi. A professional camera usually has the ability to purchase an accessory from the manufacturer (such as Canon’s WFT units) allowing images to transfer wirelessly to a computer immediately after the image has been taken. At a professional photo station this allows the attendee to be photographed, the image corrected in the computer, an overlay and/or background added, and a photograph produced in about 45 seconds.

Tethered Camera. One end of a USB or Ethernet cord is plugged into a camera, the other end plugged into the computer. The effect is the same as wi-fi, transferring the images to the computer quickly. The drawback is the cord can be in the way, a tripping hazard, and/or unsightly. A cameras USB cord is limited to 16 ft, unless a repeater is used.
Camera Card Swap is when the CF or SD card (the chip) is taken out of the camera, handed to a computer operator. The computer operator plugs the “chip” into a card reader, then downloads the images to the computer. The photographer places another card into his camera and goes back to photographing. This method has its place, but not at a photo station, a step & repeat line, or anyplace you must photograph, and print right away.

Digital Green Screens® Background vs. Generic Green Screen (Chroma Key)

Why do some green screen images look GREAT, others look mediocre to bad? Think of the movies, Life of Pi, The Dark Night, The Lord of the Rings, 300, Titanic, etc. They look fantastic! Why; they were filmed with good studio lighting, and the correct Green Screen – Digital Green® Screens.
Digital Green® Screen is Hollywood’s Favorite green screen. Hollywood even presented the developers of Digital Green® an Academy Award, an OSCAR for developing Digital Green®. Digital Green® are Luminant dyes and pigments formulated to block red wavelength light. Resulting in a green screen that reflect a focused band of pure green. The pure green is dropped out for a GREAT green screen image.

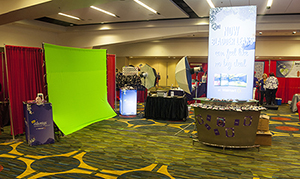
As with any professional equipment used to obtain quality results, Digital Green® is expensive compared to generic green screens (chroma Key green). Why are generic screens used; because generic green screens are Inexpensive/cheap. Usually dyed onto inferior materials that can wrinkle (casting unwanted shadows),

the color of green varies from manufacturer to manufacturer, producing a mediocre to poor drop out of the green. The final photographic images are not impressive. Clients are usually underwhelmed, and not as open to using green screen again at additional events.

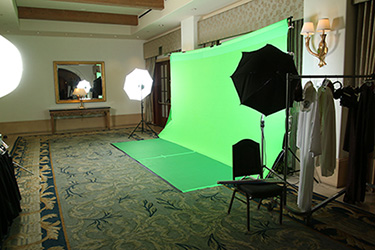
Quality of studio lighting, knowing how to light a green correctly, using the correct Digital Green® screen are some of the keys to a successful, Hollywood Quality green screen event.

Custom Folders vs Here’s Your Print

At the end of the line at a typical slow photo booth (think 3,2,1, smile), producing up to 20 prints an hour, guests are usually handed their 2×4” strip of prints. Using a professional photo station, hundreds of prints can be produced each hour. When the photographs exit the dye-sub printer, it should be placed into a folder.

The folder enhances the look, increases the value to your attendee. For our clients we custom make our own embossed folders, for 4×6 & 5×7 prints. This also allows us to 4 color print on the front and back cover of the folders for nominal fee (usually about $150 per event). Allowing additional branding & sponsorship for the event.

RAW vs JPG

A photograph taken in “RAW” format captures all the information; it is minimally processed. Raw image files allow the photographer full use of the editing tools in a program like photoshop. The photographer can lower highlights, such as a bright white shirt. Lighten only the dark shadow areas in the background of a photograph, (think ball room or convention hall), sharpen the edges of the subject, work with the mixed lighting of a hall (daylight, florescent, halogen, etc.)

It’s more work for the photographer, so some prefer not to. But Raw should be used in candid event photography when there is time to edit the photographs. Why – Because using on camera flash in event photography is not always perfect. Photographing in RAW allows the photographer to make each image look their best, highlights, contrast, the foreground & background.
Professional cameras allow you to select Large, Medium & small raw files. No need to use a large 50mb file when producing a 4×6 print, use a small Raw file.

A “JPG” image file is a compressed file with minimal information. A processed RAW image file saved as a jpg file, is perfect. A jpg image file can be edited, but minimally. JPG image files have their place at an event. A professional photo station setup with studio lights is the perfect example. A photographer sets up the lighting, and camera perfectly before the event. When the images are taken, each one is just right. This allows for quick processing, adding an overlay, with immediate onsite printing. This workflow will allow a picture to be take, transferred to a computer, overlay added, and a 4×6” print produced in about 45 seconds.

Doug Carraway – President e-mail – doug@fotoShout.com

Paul Pabian – Sales e-mail – Paul@fotoShout.com

1592 N. Batavia St. – Bldg. 1 Orange, CA. 92867

(714) 941-8680

www.fotoShout.com

Pin It on Pinterest

Share This